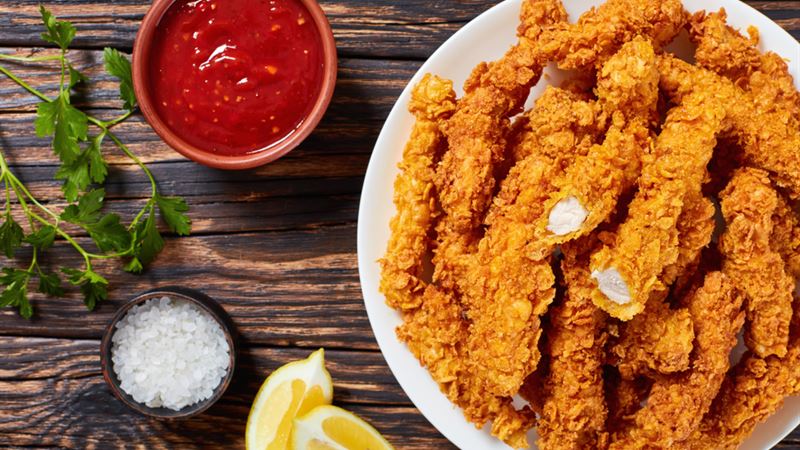
How to Prepare Delicious Glazed Fried Chicken: A Complete Guide
Discover a comprehensive guide to making mouthwatering glazed fried chicken. From selecting ingredients to perfecting the frying process, learn how to create crispy, flavorful, and glossy chicken that’s perfect for any occasion. This detailed recipe includes tips for quicker preparation and tips to achieve restaurant-quality results, ensuring your dishes impress every time. Ideal for home cooks who want to elevate their fried chicken game, this article provides step-by-step instructions, expert advice, and serving suggestions for a truly delicious meal that everyone will love.
Is preparing glazed fried chicken complex or straightforward?
- Although the process involves multiple steps, it is surprisingly manageable as this recipe requires only one main dish, minimizing cleanup and making it more convenient.
- With a balanced set of ingredients and simple techniques, you can quickly achieve crispy, flavorful chicken with a glossy glaze that enhances every bite.
Note: To expedite the preparation process, consider par-boiling potatoes for 5 minutes and using chicken pieces instead of a whole bird for faster cooking time.
Essential ingredients for making glazed fried chicken
- Approximately 3½ to 4 pounds of chicken, either a whole chicken cut into eight pieces or selected parts like legs, thighs, wings (tips removed), breasts halved, and backbone.
- 10 ounces of kosher salt, such as Diamond Crystal® or Morton, which is roughly 2/3 cup or 1 cup respectively.
- 1/3 cup of packed light brown sugar for a hint of sweetness.
- 6 tablespoons of Old Bay seasoning to impart flavor enhancement.
- 4 cups of all-purpose flour for coating the chicken.
- 3 cups of buttermilk to aid in tenderizing and binding the coating.
Ingredients for the glaze and finishing touch
- 2 teaspoons of paprika to add smoky flavor and color.
- 1½ teaspoons of cayenne pepper for a spicy kick.
- 1 tablespoon of Old Bay seasoning for added complexity.
- ¾ cup of lard for rich coating and glaze base.
- Vegetable oil for deep frying, enough to fully submerge the chicken (about four quarters).
- Additional tools: a deep-fry thermometer to ensure precision temperature control.
Step-by-step method to create this flavorful glazed fried chicken
- Begin by heating a large heavy-bottomed pot over medium heat. Once hot, add 4 cups of water, kosher salt, and light brown sugar. Whisk continuously until both salt and sugar are completely dissolved, which should take around 5 minutes. Keep the mixture warm but not boiling.
- Add the chicken pieces to this seasoned brine; remove the pot from heat, cover it, and let the chicken soak for at least four hours to absorb flavors and tenderize. For best results, refrigerate if longer soaking is desired.
- Prepare a seasoned flour mixture by combining 4 cups of all-purpose flour and 6 tablespoons of Old Bay seasoning. Mix thoroughly with your fingers, ensuring even distribution of spices. Keep aside.
- Pour the buttermilk into a medium bowl. Once the chicken is ready, take the pieces out from the brine and pat them dry with paper towels to remove excess moisture, which helps in crispy coating.
- Dip each piece into the buttermilk, allowing excess to drip off, then coat thoroughly in the flour mixture. Press firmly so the coating adheres well and fill any cracks with additional flour. Place the coated chicken on a wire rack set inside a baking tray. Repeat this process for all pieces.
- For optimal crispiness, cool the coated chicken in the refrigerator uncovered for 12-24 hours to set the crust, which enhances texture during frying.
Preparing the glaze and finishing assembly
- Allow the chicken to reach room temperature for about 30 minutes before frying.
- To prepare the glaze, melt ¾ cup of lard in a small saucepan over low heat. Add paprika, cayenne pepper, and Old Bay seasoning, stirring constantly until the lard is fully melted and infused with spices—about 3 minutes. Set aside.
- Fill a large, deep pot with enough vegetable oil to submerge the chicken pieces, fit with a deep-fry thermometer, and heat to 350°F (175°C). Maintain this temperature throughout frying.
- Carefully fry the chicken in batches, turning frequently with tongs or a slotted spoon, to ensure even cooking. Adjust heat as necessary to prevent overheating and burning. Fry until the skin is deeply golden brown and the internal temperature reaches 165°F (74°C). Remove and let rest on a wire rack for a few minutes.
- Using a pastry brush, apply the prepared glaze to each piece while still warm. Reheat the glaze if it thickens or hardens. Serve immediately or keep at room temperature for up to 3 hours for optimal flavor.
In conclusion, this glazed fried chicken recipe combines simple ingredients with straightforward techniques to deliver an indulgent yet approachable dish. The crispy coating paired with a flavorful, spicy glaze creates a feast that will satisfy any craving for comfort food. Perfect for gatherings, parties, or family dinners, this dish elevates your cooking repertoire with guaranteed deliciousness and impressive presentation.