Expert Strategies for Achieving Flawless Interior Painting and Finishing Touches
Discover comprehensive tips for achieving flawless interior painting, from preparing surfaces and selecting quality materials to advanced decorative techniques. This guide helps homeowners transform their spaces with professional results, ensuring durability and aesthetic appeal. Learn step-by-step processes, safety tips, and creative ideas to elevate your home decor with expert precision. Perfect for DIY enthusiasts and interior decorators aiming for a sophisticated finish that lasts. Get inspired to refresh and personalize every room with confidence and style.
Preparing Your Walls for a Perfect Paint Job
Starting with a clean surface is fundamental to achieving a professional-looking result. Many homeowners overlook this step, rushing into painting without proper preparation. To ensure smooth, long-lasting paint adherence, clean your walls thoroughly using a soft cellulose sponge, warm water, and a mild dish soap. Focus on removing grease stains, dust, and dirt that accumulate over time. After cleaning, rinse with plain water to eliminate any soap residue and allow the walls to dry completely. Once dry, inspect for any damages like nail holes or cracks. Fill these imperfections with quality spackling paste and sand them gently for a smooth finish. To further enhance surface cleanliness, use a tack cloth on trims, cabinets, and doors, avoiding excessive pressure to prevent damage.
Applying Painter’s Tape Correctly for Clean Edges
This crucial step should be done about a week before painting to allow adhesion and curing. Use high-quality painter’s blue tape designed explicitly for masking. Carefully apply it along junctions such as walls and ceilings, around window frames, door trims, and baseboards. Proper taping ensures sharp, clean lines and prevents paint bleed. Remember to remove the tape before the paint dries completely to avoid peeling or distortion of freshly painted edges. This simple step significantly elevates the overall appearance of your painting project by providing crisp separation between different surfaces.
Selecting High-End Paints for Longevity and Aesthetic Appeal
Investing in premium-quality paint yields better durability and aesthetic quality. Contemporary paints come in two main types: water-based (latex) and oil-based. For interior walls, water-based latex paints are the preferred choice due to their quick drying time, low odor, and excellent sheen. Modern formulations offer durability, resistance to fading, and easy cleanup. Be sure to purchase reputable brands known for consistency and longevity. Superior paints often contain better pigmentation and command a more vibrant, lasting finish.
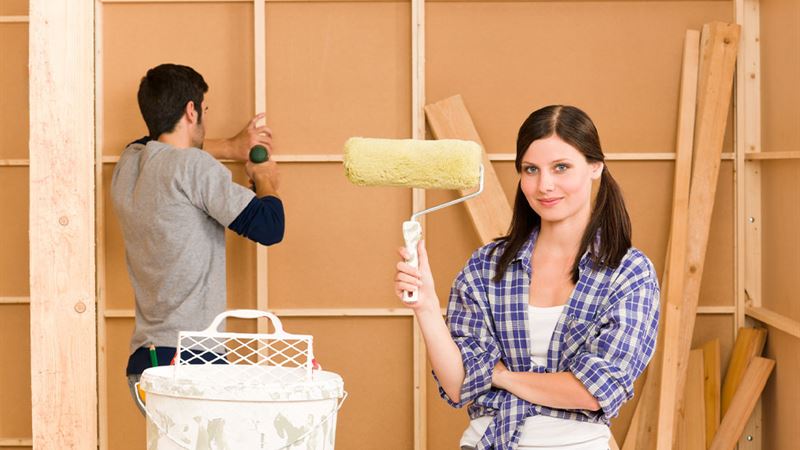
Choosing Top-Tier Painting Tools for Professional Results
The quality of your brushes and rollers directly affects the finish. Inexpensive tools tend to leave streaks, uneven coverage, or shedding fibers. Opt for high-grade brushes designed for your paint type, with fine bristles that contour to wall surfaces. Use premium rollers with a dense nap suited for smooth or textured surfaces. This investment ensures a uniform coat, minimizes drips, and speeds up the project. Clean your tools thoroughly after use to maintain their performance for future applications.
Protecting Non-Painted Areas
Before any painting begins, shield furniture, hardware, floors, and fixtures to prevent accidental splashes and drips. Cover large items with plastic sheets or drop cloths and tape off edges where painting is not desired. Proper protection minimizes cleanup time afterward and ensures that only the intended surfaces are painted, resulting in a neat and professional finish.
Priming Walls to Enhance Paint Adhesion and Finish
Priming is a vital step that prepares the surface, especially if it has been painted previously or has imperfections. A good primer seals the surface, improves paint adhesion, and prevents issues such as blotchiness or peeling. Choose a primer suitable for your wall type—latex primer for latex paints or oil-based primer for oil paints—and apply a thin, even coat. Allow it to dry thoroughly before proceeding with the final paint layers.
Applying Paint with Precision in Corners and Edges
Start with a quality brush to coat corners, trims, and edges. Doing this first prevents brush marks from forming when using rollers. Carefully cut in along edges for a clean boundary, then transition to rollers for larger wall areas. This approach guarantees an even, professional-looking finish without visible brush strokes.
Using Appropriate Protective Gear During Painting
Wearing disposable latex or nitrile gloves keeps your hands clean and protected from paint and chemicals. Select gloves based on any allergies—nitrile gloves are a great alternative for those sensitive to latex. Additionally, wearing safety goggles and masks can protect your eyes and respiratory system during the process, especially when dealing with fumes or sanding.
Maintaining Consistency with Even Strokes and Adequate Drying
Apply the paint in smooth, even strokes, maintaining a wet edge to avoid lap marks. Work on one wall at a time, allowing each coat to dry completely before moving on. Proper drying ensures maximum adhesion and an even, resilient finish that will stand the test of time. Multiple coats may be necessary depending on the color and paint type.
Thorough Cleanup Post-Painting
Once painting is complete, remove all protective coverings and tape carefully. Clean brushes and rollers with warm water or the appropriate solvent as recommended by the paint manufacturer. Remove any paint splatters or drips from floors, furniture, and fixtures. Proper cleanup not only prolongs the life of your tools but also maintains the overall neatness of your workspace, preparing your room for furniture placement and decoration.
Creative Wall Decorative Techniques to Elevate Home Aesthetics
After completing your painting project, consider additional decorative techniques to personalize your space and add visual interest:
- Stencil Design
Using stencils allows you to add intricate patterns or motifs easily, transforming plain walls into works of art. Choose designs that complement your decor style for a cohesive look. - Metallic Finishes
Metallic paints or foils create eye-catching accents that reflect light and add a touch of luxury to any room. They can be applied as borders, focal points, or entire feature walls. - Bold Stripes
Vertical or horizontal stripes can make a room appear taller or wider, respectively. Use painter's tape to create crisp, symmetrical lines for a modern or classic look. - Polka Dot Patterns
Playful and timeless, polka dots add whimsy and charm. They work well in kids' rooms, kitchens, or accent walls. - Strie Effect
Inspired by linen fabric, the strie technique involves layering translucent glazes to produce a textured, streaked appearance that adds depth. - Sponging Technique
Applying paint with a sponge creates dynamic textures and visual interest. Use different sponge sizes and colors for a custom look. - Checkerboard Patterns
Classic and vibrant, checkerboard designs inject a lively energy to walls, especially in kitchens or game rooms.
Remember, selecting the right colors and techniques depends on your personal style. Consulting with a professional or interior designer can help you make informed choices that complement your space and reflect your taste. With patience and the right approach, your home's walls can become stunning focal points that enhance the entire ambiance.